
Dental compressor not working?
Diagnose it yourself before calling an engineer!
If your dental chairs have no air, your handpieces aren't running, or your 3-in-1 syringe has stopped working, you may have a compressor fault — but not always. A significant number of these calls turn out to be something simple: a tripped switch, a blown fuse, or a thermal reset that just needs pressing.
This guide walks you through the same diagnostic process used by dental field service engineers. It takes around 10 minutes and could save your practice an unnecessary callout fee of £150–£400.
No technical knowledge required. Written for dental nurses and practice managers.
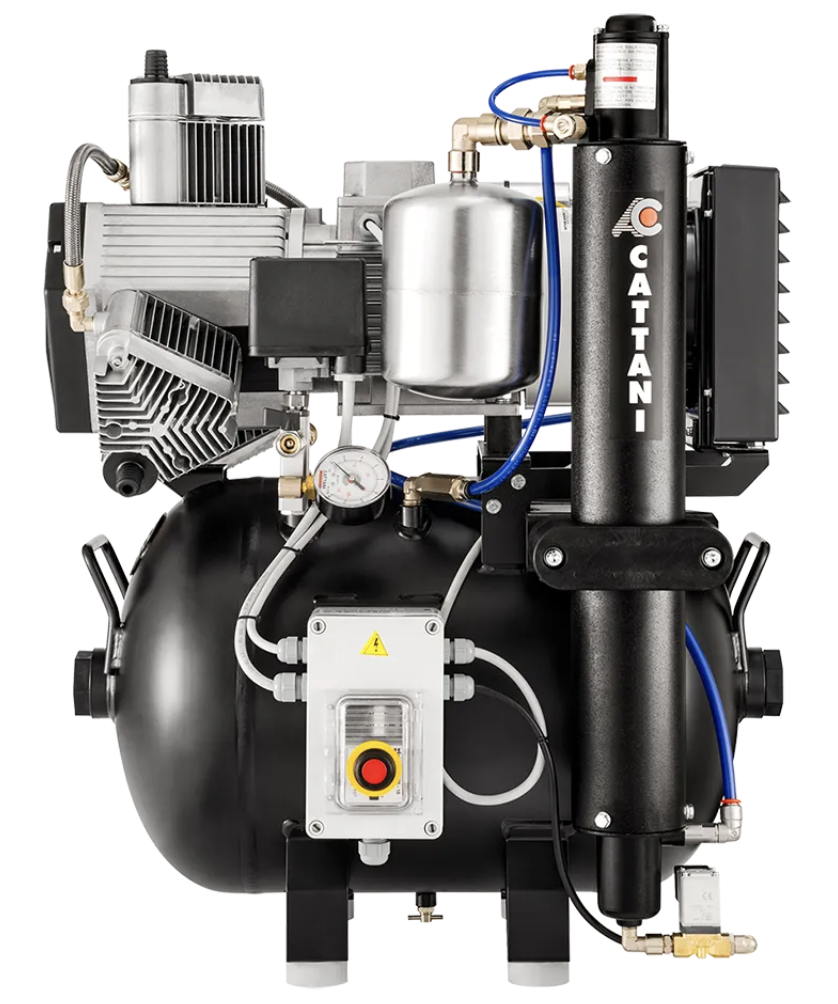
What Does a Dental Compressor Actually Do?
The compressor is the heart of your dental practice. It supplies pressurised air to everything that needs it — dental chairs, handpieces, 3-in-1 syringes, and air-driven equipment throughout the surgery.
Without a working compressor, most clinical activity stops entirely.
Your compressor has two pressure gauges you should be able to see on the unit itself:
The main gauge — this should read between 6 and 8 bar (90–120 psi) when the compressor is running normally. This is the one to check first.
The secondary gauge — this shows regulated air and should sit at a constant 5.5 or 6 bar. It shouldn't move much.
If the main gauge is reading zero, the compressor is not running or not building pressure. That's where this guide starts.
Step-by-Step Dental Compressor Fault Guide
Work through these steps in order. Each one takes no more than a minute or two.Step 1 — Check your handpieces and 3-in-1 syringe
Before assuming the compressor is the problem, pick up your 3-in-1 syringe and test it. Press the air button and the water button separately.
If both air and water come out — your compressor is working. The problem is likely with the chair itself, or an air leak somewhere between the compressor and the chair. Check whether other surgeries are affected. If only one chair is down, the fault is in that chair or its supply line. You'll need an engineer for this.
If there's no air — continue to Step 2.
Step 2 — Read the compressor pressure gauges
Go to your compressor unit and look at the two gauges on the front.
Main gauge should read between 6–8 bar
Secondary gauge should read 5.5–6 bar (constant)
If both gauges are reading zero, the compressor has no pressure — either it's not running, or it has lost power. Continue to Step 3.
If the gauges show normal pressure but you still have no air at the chair, the compressor is fine. The fault is between the compressor and the chair — likely an air leak, a closed valve, or a faulty component in the chair. Contact an engineer and let them know the compressor gauges are normal.
Step 3 — Check all switches and fuses
Before assuming a compressor fault, check every switch in the power chain. It's a longer list than most people expect:
Main fuse board — go to the electrical board for the building and check no switches have tripped. Flip the tripped switch back on.
Wall socket — is the socket the compressor is plugged into switched on?
Socket isolator switch — many dental practices have a dedicated isolator switch near the compressor socket. Make sure this is on. Check the fuse inside it too — these do blow (13A).
Plug fuse — if the compressor plugs directly into a socket, check the fuse in the plug (usually 13A).
Compressor on/off switch — make sure the compressor's own pressure switch or on/off switch is in the ON position.
If everything is on and the gauges are still at zero, continue to Step 4.
Step 4 — Test whether the socket has power
Unplug the compressor from the wall socket. Plug in a phone charger instead.
If the phone charges — the socket has power. The fault is in the compressor itself. Continue to Step 5.
If the phone doesn't charge — the socket has no power. This is an electrical supply issue, not a compressor fault. You'll likely need an electrician. Double-check the isolator fuse and the main fuse board before calling one — these are the two most common causes.
Step 5 — Try the thermal reset switch
Many dental compressors have a thermal reset switch — usually a small red button on the side or back of the unit. This trips automatically when the compressor overheats or works too hard.
Look for a red button on your compressor. If you find one, press it firmly. You should hear or feel it click.
Then try turning the compressor on. Some models require you to turn the pressure switch to kick-start it after a thermal reset.
If the compressor starts running — great. Monitor it over the next hour. If it trips again, your compressor is struggling — it may be undersized for the practice or in need of servicing.
If nothing changes — the fault is internal. Continue below.
When You Need to Call an Engineer
If you've worked through all five steps and the compressor still isn't running, the fault is internal to the unit. Common causes at this point include:
A failed capacitor (very common — the compressor hums but won't start)
A faulty pressure switch
A blown internal fuse
A failed motor
An undersized or ageing compressor that needs replacing
At this stage you'll need a dental engineer visit. Before you call, make a note of:
The compressor make and model (usually on a label on the unit)
Which steps you've already tried
Whether the compressor makes any sound when it tries to start
This information will help your engineer arrive better prepared and may reduce their time on site.
One thing worth knowing: a compressor that keeps tripping, keeps overheating, or struggles to maintain pressure may simply be too small or too old for your practice's current demand. An engineer can advise on whether repair or replacement makes more sense.
Download the Free Printable Checklist!
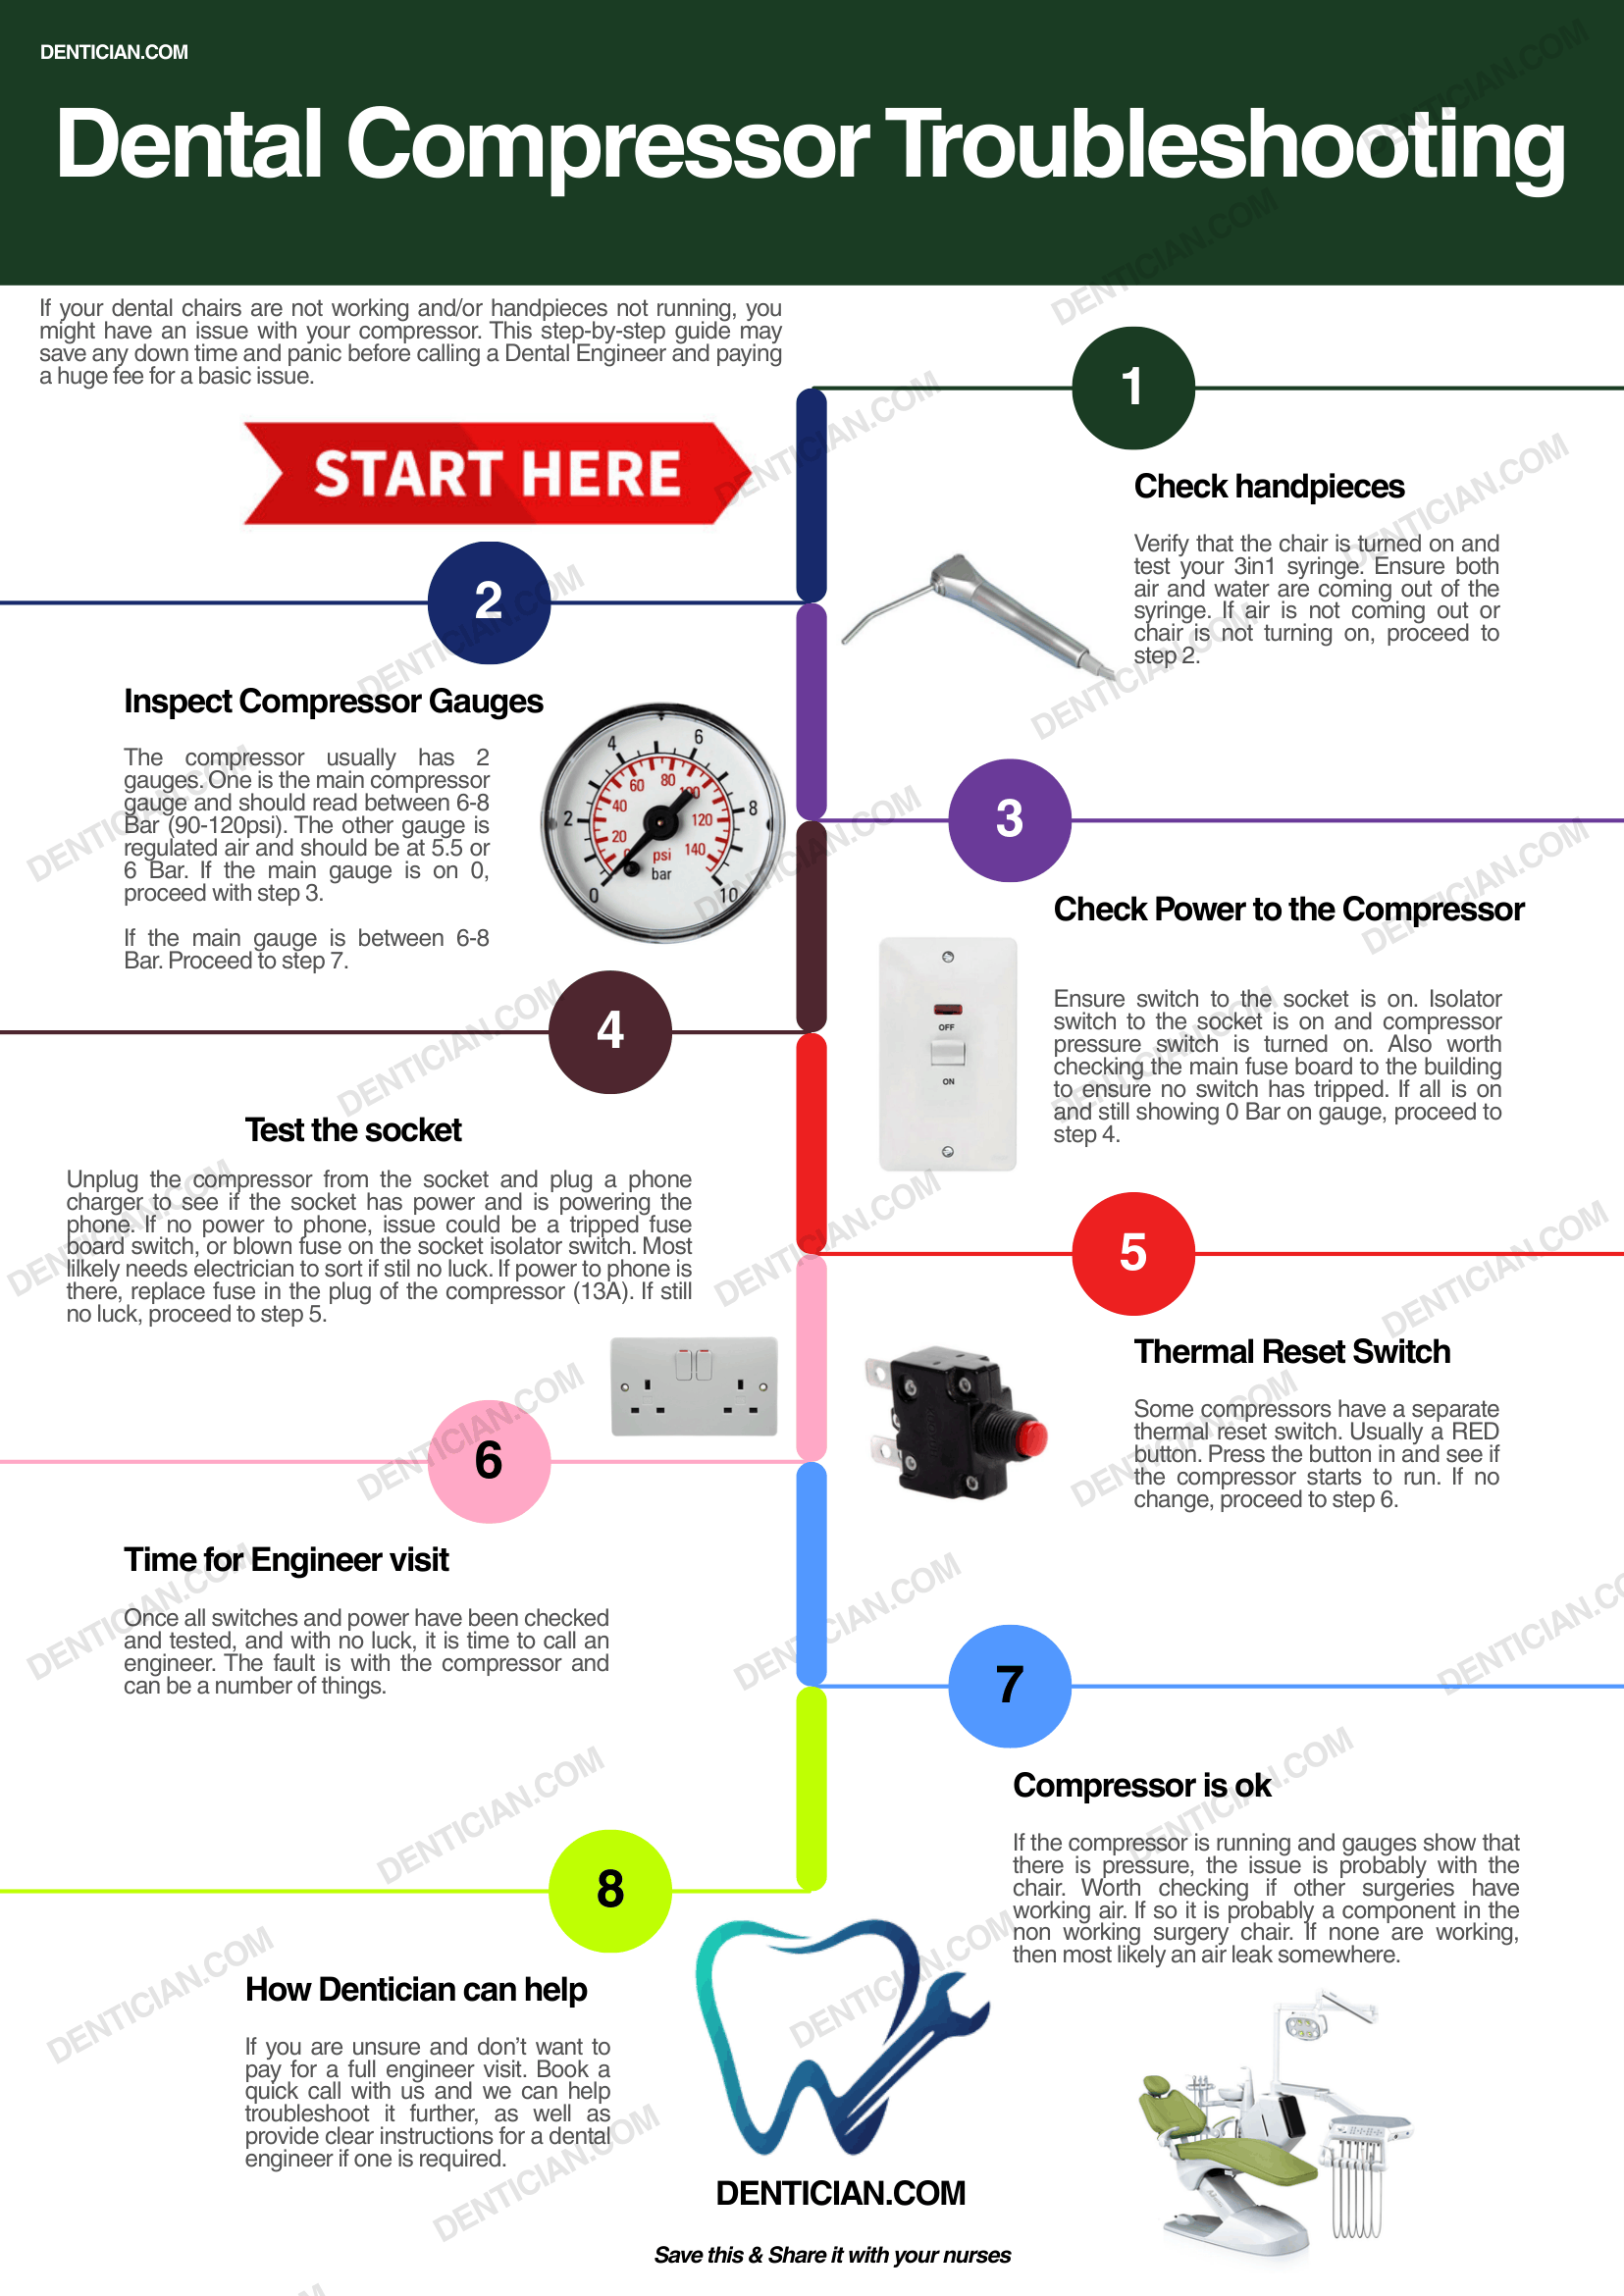
Still Stuck?
If you've worked through this guide and you're still not sure what's wrong — or you want an expert to walk you through it in real time — book a 30-minute remote triage call.
For £70, a former dental field service engineer will assess the fault with you via phone or video call, tell you exactly what's wrong, how urgent it is, and give you an engineer-ready fault description so you're not paying for diagnostic time on the callout.
Most practices save more than the call fee on the engineer visit alone.